Tis’ the season for trying to capture that PeRfEcT photo for the annual Christmas card! You know the one I’m referring to that gives the illusion that your kids never fight, don’t play in the mud, and wear matching outfits daily. First there is the decision over whether to go to a portrait studio, hire a photographer and do an outdoor family photo shoot, or take the pictures yourself. Once that is decided the planning of the outfits can begin. The ridiculous part about this is that stores start putting out their holiday lines in October so if your kids wear a popular size you better be thinking ahead. Ok, now you know who is taking the picture and what everyone is wearing, but here is the hardest part…getting everyone to cooperate! 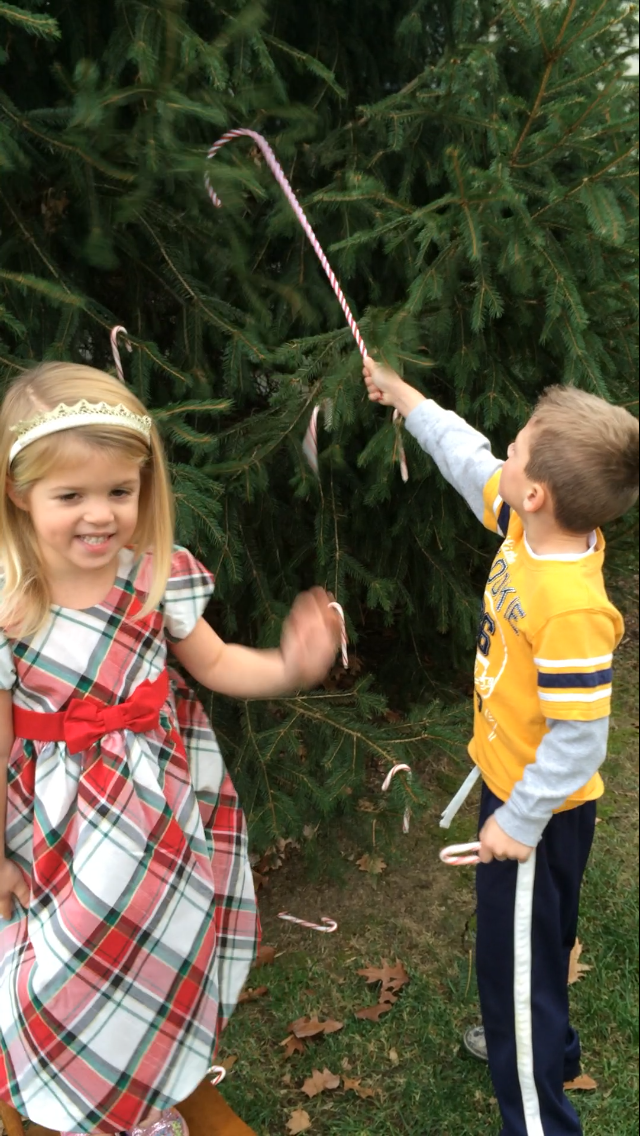
I am sure many of you moms are going through this torture over the next few weeks so let me share my Christmas card 2013 attempt with all of you. Before I start getting all sorts of complaints from dads, I chose to write moms because maybe there are one or two dads out there who break the mold and take the kids for the Christmas photos, but in MY experience, there is NO dad who wants to be anywhere near this unprecedented madness EVER!
This year I was going to have a friend who is a professional photographer take photos in our yard. Well that idea went down the toilet when I had to cancel the session because it had rained the night before and the grass was soaking wet. I know my kids would never have cooperated if their feet were soaking wet from the grass and we wouldn’t have gotten the photos that I wanted to get. My second attempt pictured above was yesterday. I thought I could take the bull by the horns and take the photos myself. I’ve done it before so why not? Here’s why not…apparently I bought my son “handsome” clothes instead of “cool” clothes and he refused to put them on. In a desperate attempt to move forward with my plan I decorated a tree with candy canes and figured I would at least get my daughter’s picture done since she was all dressed and loves getting her picture taken. I figured my son would get jealous and cave once he saw her getting all the attention and put the cute plaid shirt and sweater on, but boy was I wrong. What erupted was like a scene out of a Christmas horror show. While my daughter was standing on a chair smiling my son took one of my giant candy cane props and started chopping down the candy canes one by one out of the tree faster than I could grab him. Candy was flying all over the place, my daughter was wobbling in a chair in her Christmas dress, and all I was thinking was, don’t react like Clark Griswold when his lights don’t light up in Christmas Vacation!
Needless to say, we marched back in the house after picking up all of the broken candy canes and I am left with this fantastic picture that I share with all of you. Please keep it in mind when you are stressed to the max this Christmas season. As you receive your mail full of smiling faces each day remember a lot more goes into those cards than you think and don’t be too hard on yourself if your journey to whatever your PeRfEcT card is isn’t so PeRfEcT!
~Robyn (Jersey Girl)